8 minutes
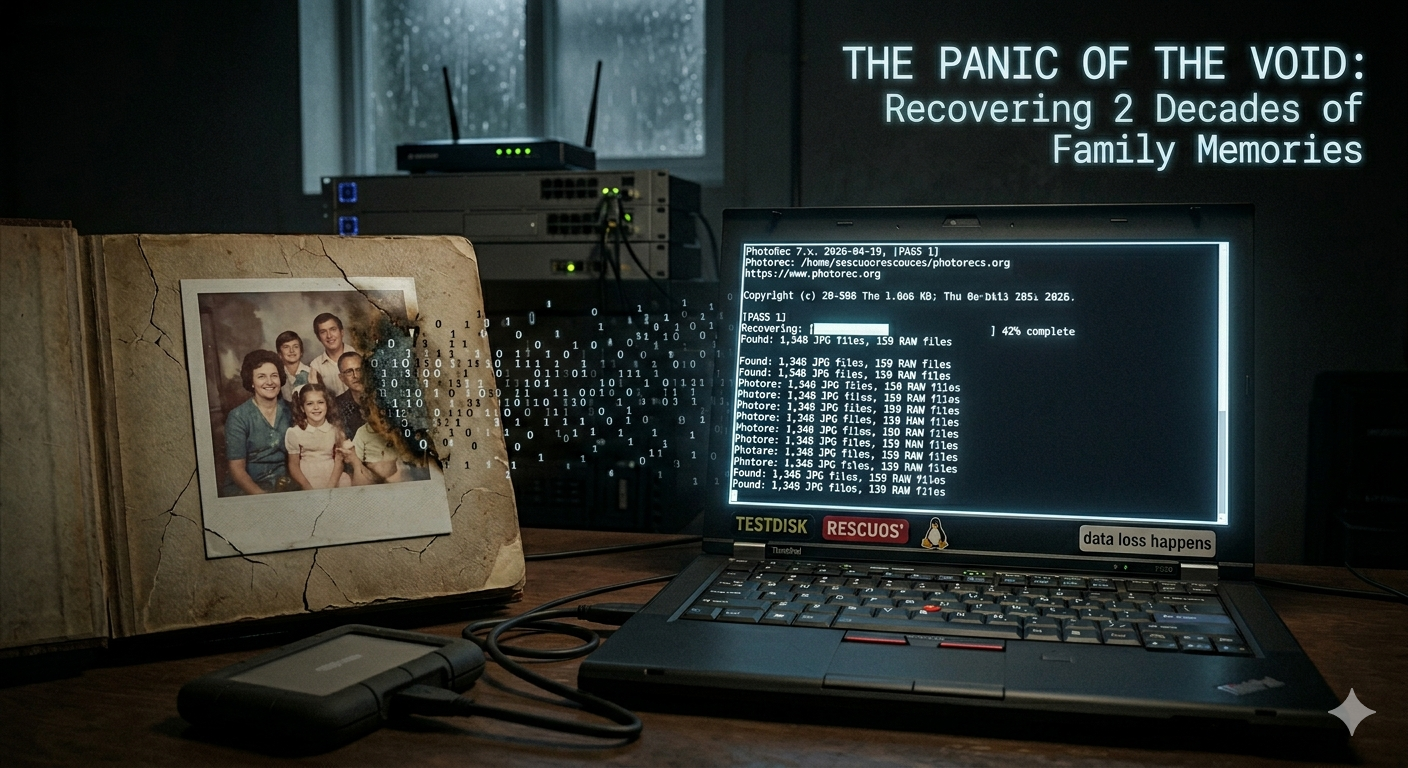
The Panic of the Void: Rescuing 26 Years of Family Memories from a Raid Array
I’ve mentioned in previous posts that I had one server that was an all-rounder. It ran Debian and served as my main storage and Docker workhorse. It had been running constantly since my early days of college. Best practices need not apply.
Times changed and Proxmox became my primary workhorse. I migrated the others over, moved all the services that I could, and I was left with one stubborn service that I was hesitant to pull the plug on. That service was Immich.
Setting the Stage
I had taken stock of the services stored on the device, turned off all the services, and backed up their respective folders (or so I thought).
All that was left was Immich. Those photos had been through quite a ride throughout their digital lifetimes. Here’s a brief synopsis of the life some of the oldest photos have lived.
- 2002 - Photo taken on PENTAX Optio 230
- Photo uploaded to Apple eMac
- Imported into iPhoto
- 2010 - eMac heavily used until family buys an iMac due to impending disk failure; pictures abandoned
- eMac put in storage
- 2024 - I discover eMac in storage
- Boot it up
- Export all the data I could before disk died
- Import iPhoto library into Photoprism
- 2025 - I discover Immich
- Migrate Photoprism library to Immich via external library
- 2026 - Backed up the array (or so I thought)
- Installed Proxmox on top of the array
- Forensically recovered via Photorec
- Re-imported into Immich via immich-cli Docker container
The Disaster
So it was finally time to move my server over to Proxmox. I rsync’d my Immich directory and that of other services over to external drives and other computers just to be safe.
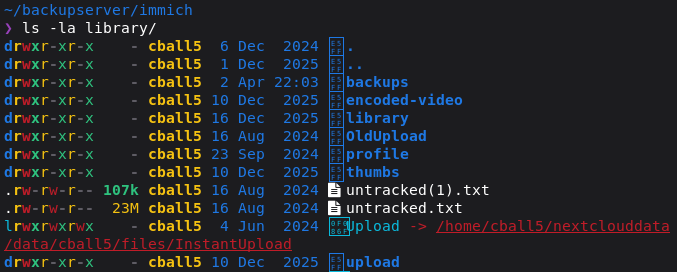
Note how in the timeline it mentions that I used the external library functionality from my Photoprism. This is essential to the story. Take a look at my Docker Compose file. Seems easy enough, right?
  immich-server:
    image: ghcr.io/immich-app/immich-server:${IMMICH_VERSION:-release}
    volumes:
      - ${UPLOAD_LOCATION}:/usr/src/app/upload
      - ./library/Upload:/usr/src/app/external
      - ./library/Upload2:/usr/src/app/external2
      - ./library/OldUpload:/usr/src/app/OldUpload
      - /etc/localtime:/etc/localtime:ro
I thought so too. Then, without testing it first, I nuked the server and installed Proxmox.
A day or two goes by, I’ve installed some services on the new Proxmox node. I finally get around to deploying the Immich I’d backed up.
I docker compose up -d and expect things to go smoothly from then on. Oh boy. That’s not what happened. It gave me an error. Something to do with the Upload folders not existing.
oh no, nononononoonono
Shoot, is that a hardlink?
My initial instinct is denial.
No, this can’t be right, I copied everything.
Wait, did rsync follow the links? Evidently not.
What do I do now?
Well, I’ve written several hundred gigs to this array since I installed Proxmox. As you can imagine, my first course of action is:
https://letmegooglethat.com/?q=How+to+recover+filesystem+from+disk
I immediately killed the Proxmox node and booted RescueOS into RAM via iDRAC. OK, at least nothing is writing to the array now.
Google leads me to believe that TestDisk and, failing that, Photorec are the way to go.
Unique considerations
This server has been used for a great many things. It’s got 30 TB of storage and was used for video archival of YouTube channels. My mind went from doom to hope when I learned:
- Data is written throughout the array from beginning to end chronologically (sort of)
- The array hasn’t been changed at all
- I didn’t do any sort of secure erase of the array
- I had been writing 15+ TB of video to the array over the duration of my possessing the server
This means:
- My photos and videos will be spread out throughout the array, as all those video archives will have been written farther down the array
- I wasn’t optimistic that I would be able to recover the filesystem, but I would probably be able to get the pictures
Storage
So now you have come to understand that the server is 30 TB in size and is my main workhorse as far as storage goes.
Now let’s talk logistics. I know I can probably carve the array and get the files, but where am I going to put them? I have a max of 3 TB of space in my office workstation. I know that my photo library is less than that, but a lot of data has touched that array. I was expecting to run out of space very quickly.
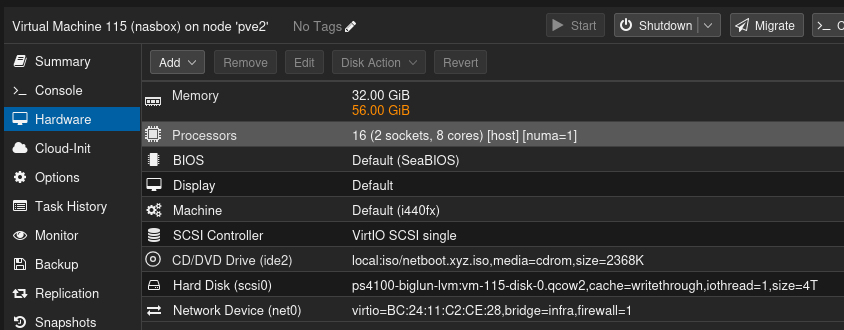
Later on in the journey, I modified my existing setup with my Dell EqualLogic PS4100 SAN to create a VM on my cluster. This VM acted as a NAS, with its disk living on the SAN. This afforded me 5 TB more space than I had before.
Phase 1 - Initial investigation
RescueOS is booted and Google firing on all cylinders. Now to see how screwed I am.
TestDisk
Alright, let’s see if we can find my filesystem. Start TestDisk, select the array, and hit go.
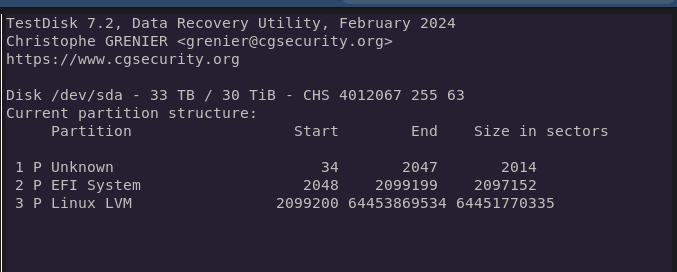
Not quite what I was hoping for, but we’ve got a ways to go yet. Hit “Deeper Search” and wait a while.
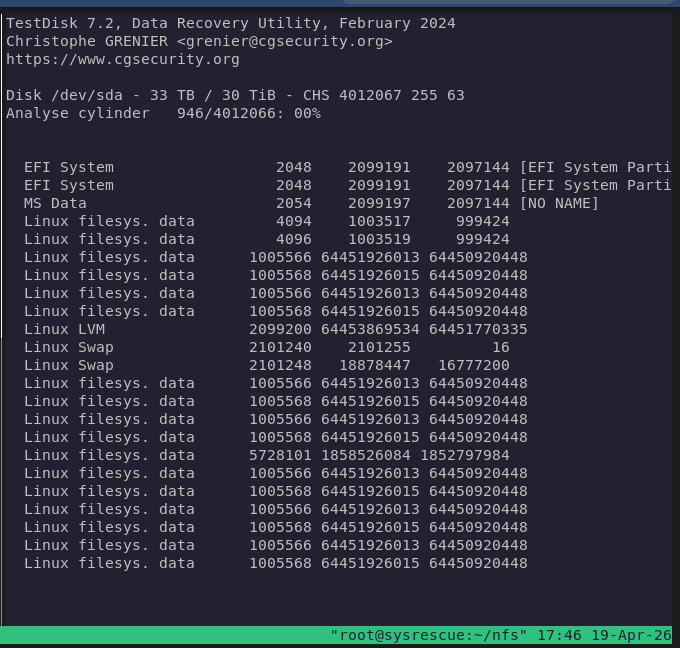
Not only did this not work, I wasted many hours trying to see if one was the right one. So many VM disks had been on this array that this was hell.
Phase 2 - Recovery
Photorec
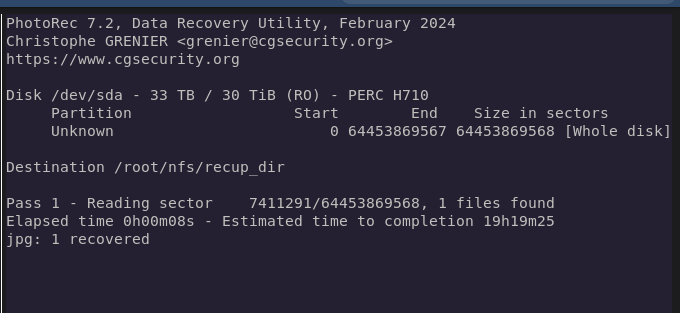
Oh, it got something.
But wait, where am I supposed to put these again? This was my main storage machine.
Connected it to the network and used sshfs to put all the found photos directly onto my workstation.
A couple hours later it was full of random stuff.
Let’s narrow down the types of files it looks for to:
- jpg
- png
- heic
- mov
- mp4
This yielded much better results. But I was getting millions of thumbnails, icon files, and useless images that I’d never use. Oh, and I was rapidly running out of space again.
Had ChatGPT whip me up a bash script that looks for the following features to free up space:
- Delete PNG files that follow typical icon aspect ratios and lack metadata
- Use ffprobe to check whether a video file is valid or not; delete if corrupt
- Use exiftool to check whether a video has proper EXIF data; if not, delete it
- Use exiftool to check whether a video file is one of the YouTube video archives; if so, delete
- Generate a hash of each video, append it to a file; if a video matching that hash exists, delete it
This also had a lockfile, as the hashing process could take a while for larger files.
Still not enough storage
My workstation was running out of space and had already stopped the recovery once due to storage running out. Now what?
Well, I have a Dell EqualLogic PS4100 SAN. I hadn’t gotten around to fully integrating it into my Proxmox cluster yet, but it had 10 TB and that was my best shot. Here’s where I went from there:
- Create new VLANs for iSCSI traffic
- Free up 2 ports on each server for storage traffic
- Create VLAN subinterfaces with MTU 9000 with IP in group IP subnet
- Create 5 TB LUN and a couple smaller LUNs
- Add iSCSI LUN to Proxmox, enable LVM on iSCSI
- Create NASbox VM to handle storage from recovery; VM disk size 4 TB
- Export NFS share on NASbox
At this point I migrated the found files over to the NASbox and resumed the recovery with the files going over to the NFS share.
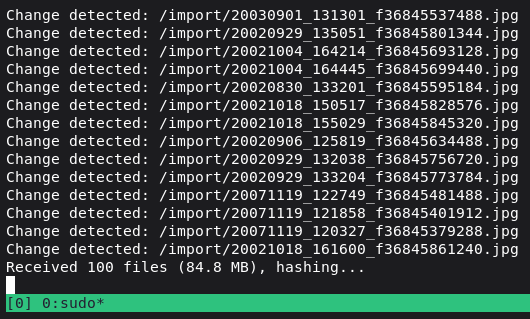
Sorting through the sea of data
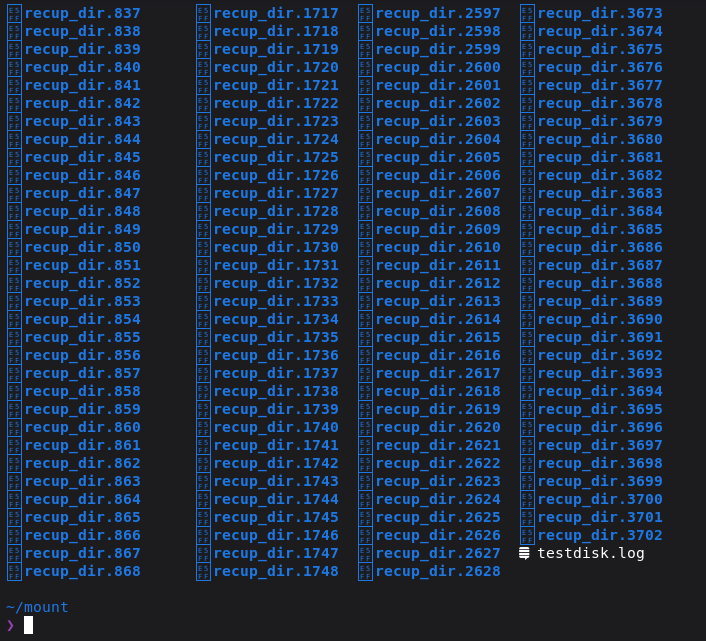
OK, so now I was getting images I recognized, some containing metadata and some not. The image above only shows half; the other half is in another nested directory.
Immich, being what it is, needs EXIF data for it to fit nicely in the timeline. So I figured:
OK, let’s just run a script to find all image and video files with “created on” or equivalent metadata and copy them to a folder.
#!/usr/bin/env bash

SRC="$1"
DEST="$2"

if [[ -z "$SRC" || -z "$DEST" ]]; then
  echo "Usage: $0 <source_dir> <destination_dir>"
  exit 1
fi

mkdir -p "$DEST"

exiftool -r \
  -ext jpg -ext jpeg -ext heic \
  -if '$FileSize# > 102400 and ($DateTimeOriginal or $CreateDate)' \
  -api QuickTimeUTC=1 \
  -api LargeFileSupport=1 \
  -m -q -q \
  -d "%Y%m%d_%H%M%S" \
  '-FileName<${DateTimeOriginal;$_=$CreateDate if not $_}_%f.%-e' \
  -o "$DEST/%-c.%e" \
  "$SRC"
That found 98% of the library I was looking for, and then some.
That leaves the videos
Most of the videos were taken from a small number of cameras, and I still had the bulk of my older and newer videos in the other libraries. As such, I filtered by camera make Samsung and Apple. I also filtered by videos longer than 5 seconds to avoid picking up any live photos.
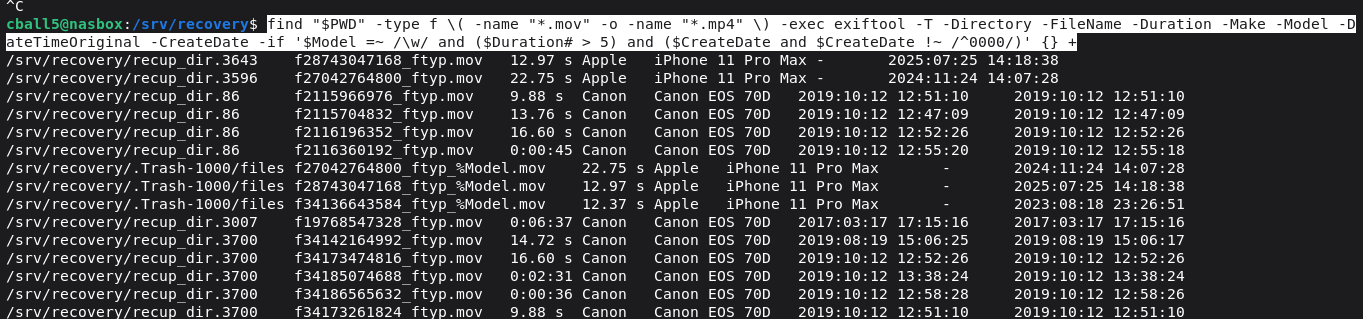
find "$PWD" -type f \( -name "*.mov" -o -name "*.mp4" \) -exec exiftool -T -Directory -FileName -Duration -Make -Model -DateTimeOriginal -CreateDate -if '$Model =~ /\w/ and ($Duration# > 5) and ($CreateDate and $CreateDate !~ /^0000/)' {} +
To get a lay of the land, I ran this script to get a feel for what kinds of datapoints I could use as filters.
yes, I totally used AI to make it
Uploading to Immich
sudo docker run -it -e IMMICH_INSTANCE_URL="https://immich.cball5.club/api"\
 -e IMMICH_API_KEY= -v "$(pwd)":/import \
 ghcr.io/immich-app/immich-cli:latest upload --recursive /import --delete --delete-duplicates --watch
To minimize the usage of space, I used a specific combination of immich-cli flags in concert with my script above to add photos and videos as they’re discovered and then delete the resulting copied file.
This may not be the most efficient approach, but I just wanted my server back.
Conclusion
After all was said and done, I was able to recover most, if not all, of my photos. This was an adventure to say the least and had the highest possible stakes.
If anything was lost, I have yet to notice.
Moral of the story:
Back up your stuff properly.
homelab digital forensics rescueos testdisk photorec
1643 Words
2026-04-19 00:00 (Last updated: 2026-05-02 05:26)
2f80c01 @ 2026-05-02